I’m joining with some of my fellow gardeners from the #SixOnSaturday group to bring you a new series of posts that will include some easy plant propagating ideas and conversations about favourite gardening tools.
I’m joined today by Arwen from Notes From The Under Gardener who is sharing her tips about successful rose propagation.
Roses are very easy to grow from cuttings. Most purchased rose plants are grafted, with the cultivated rose grafted onto a rootstock: it is a gardener’s secret that plants struck from cuttings, for free, will usually be stronger and more vigorous than their purchased grafted parent. Once you’ve got the knack of striking rose cuttings, you won’t be able to stop yourself, and will soon end up with so many rose plants that you’ll have to give some away.
It is possible to propagate roses from both soft and hard wood cuttings: hard wood cuttings take longer but I have always found them to have a higher success rate, so it’s those I will describe here. It is inevitable that some cuttings will fail, with rotting off being the usual cause: don’t be discouraged, just prepare more cuttings than you need and expect to lose some. There will always be some successes.
Late autumn to winter is the traditional time for hard wood cuttings. I like to make use of rose prunings rather than binning them, and I generally do a light prune of all the roses towards the end of autumn followed by a much harder prune around January – February (I am in the UK, USDA zone 9). I have found that prunings from both periods have produced strong healthy new plants – I’d recommend trying a few at different times, to see what works best for you.
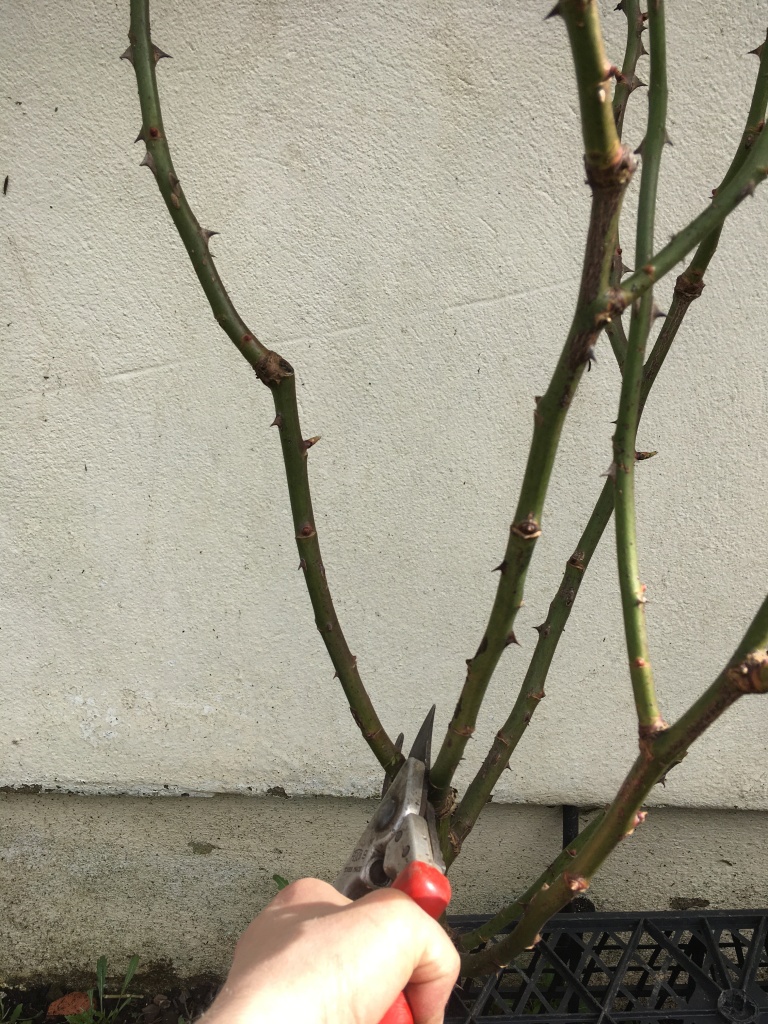
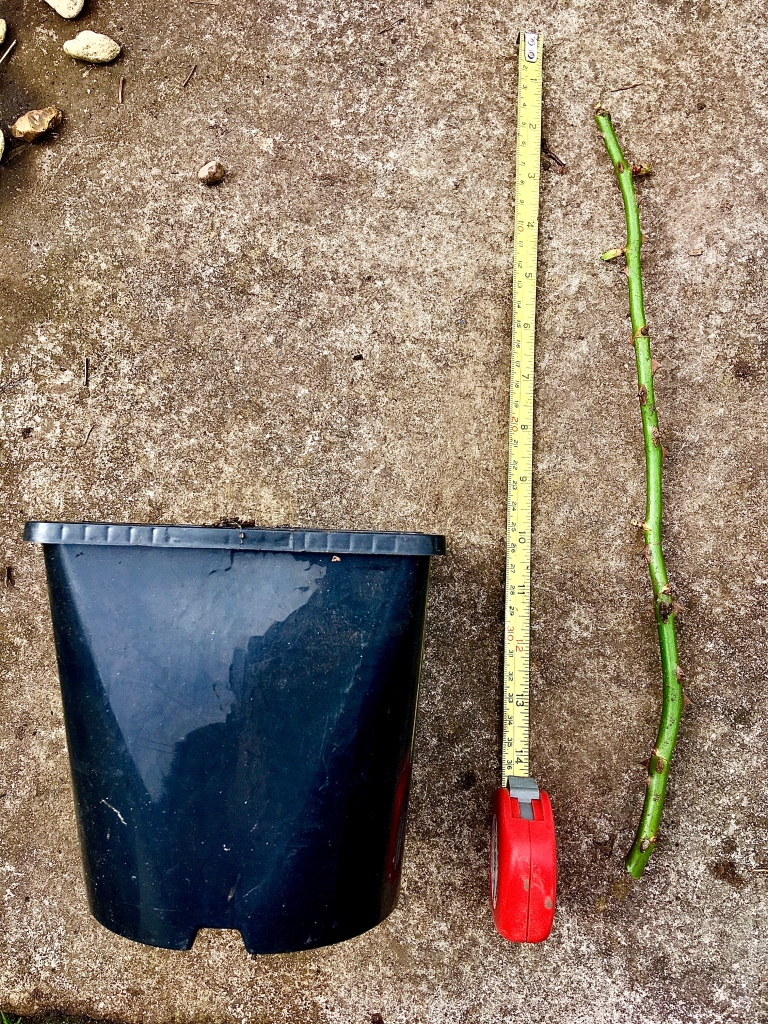
Select a nice long stem – ideally about 12 inches in length, preferably no less than 6 inches unless the size and habit of the parent plant necessitates it.
I try to select stems of around pencil thickness but cuttings from more delicate varieties may need to be smaller – if so, be sure to select the straightest, most vigorous stems for cutting. Look for areas on the stem where you can see that a new bud will break. This can be hard to spot at first but regular close examination of the stems will help.
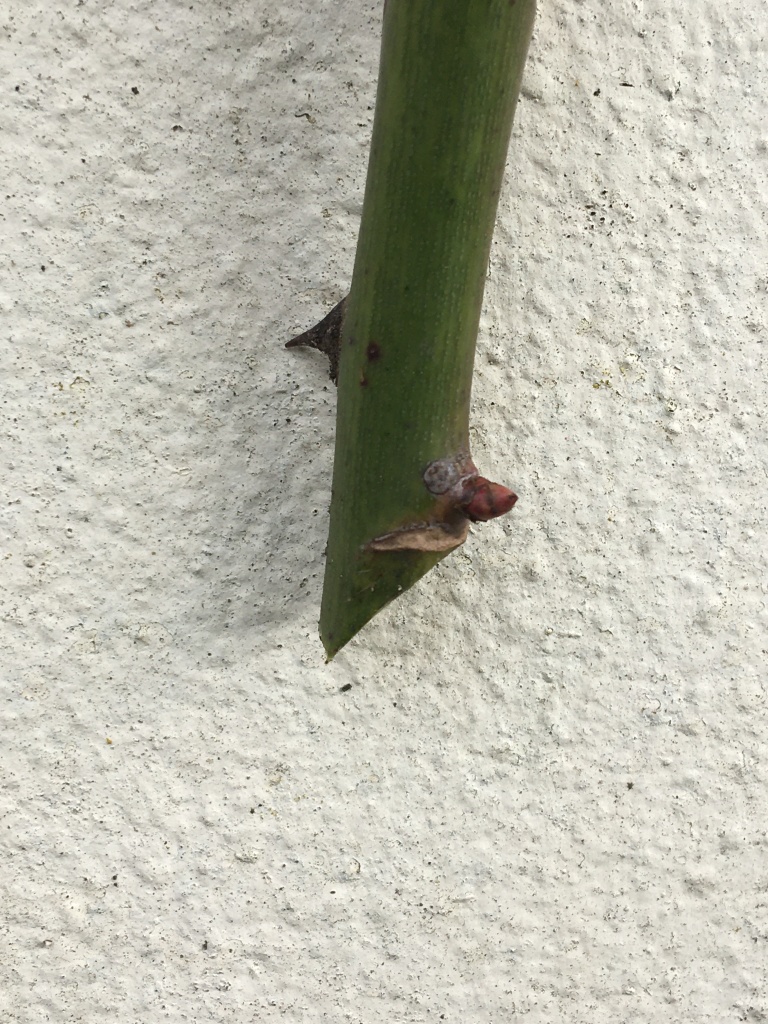
I’ve tried to show the pink bump which is the start of a new stem, just above my diagonal cut at the bottom of the cutting. Cutting at this point means that the cells that were going to be a new shoot can instead become roots, and cutting diagonally increases the surface area available for intake of water and root development. If you find you need to reduce the length of the stem, make your cut at the top of the stem horizontal, not diagonal – this way, you will know which end is top and which is bottom if you get mixed up!
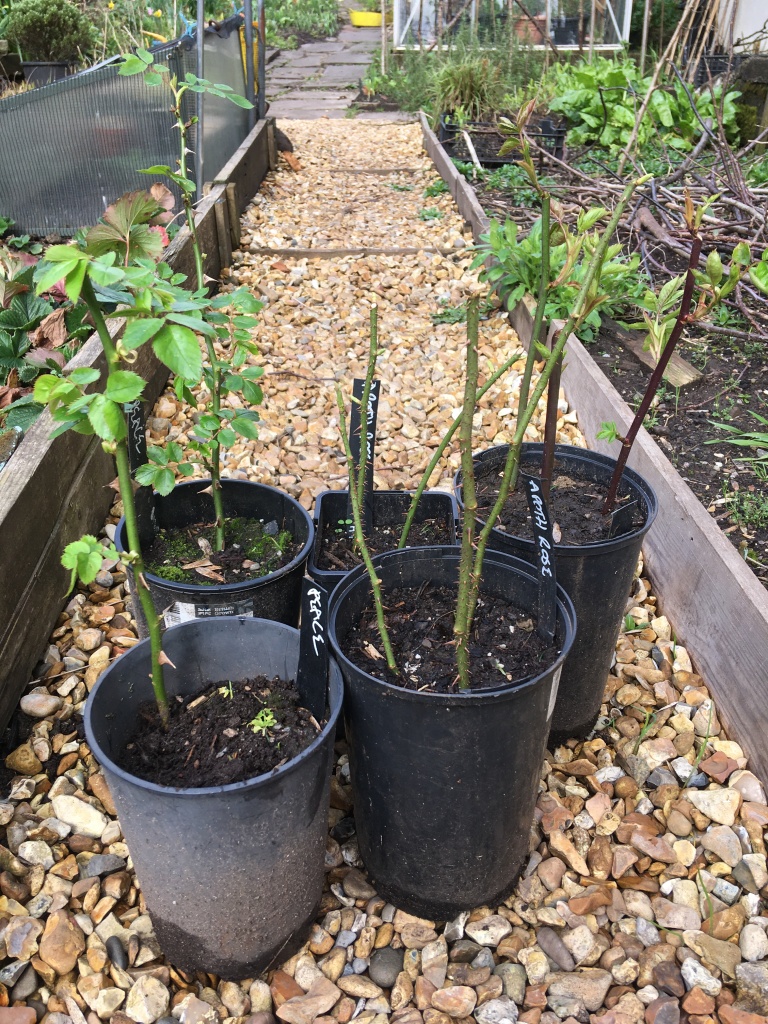
It now really is as simple as sticking your stem into some soil. If you have a nursery bed or a spare patch of soil, you can just stick the cut stem into the ground if you choose – make sure you plunge it in deeply, to about half the stem’s length. Chose an area that has the same growing conditions as the parent plant. I have grown many new rose bushes in open ground in a nursery bed this way but I generally prefer to use a deep pot of compost instead: I think the edges of the pot somehow encourage the rootball development and pot cultivation also allows you to move your cuttings if you need to. If using a pot, make sure it’s deep enough to accommodate half the length of your cutting with a little space left at the bottom of the pot.
The type of longer pots that clematis come in are ideal. Fill your pot with compost and firm it down – I would recommend using a mixture of multi-purpose compost with some garden soil mixed in if possible – and plunge the cutting in so that half of its length is buried in the pot, but not so deep that the bottom of the stem touches the very bottom of the pot. You want there to be an inch of so of compost left between the end of the stem and the bottom of the pot, but do you want a good half of your cut stem buried in the compost. Leave the pot somewhere that will give your cuttings a little shelter from drying winds, like near a wall, but make sure they’re getting good light and if they’re in rain shadow, don’t forget to keep them well watered.
Whichever method you have chosen, water your cutting well on first planting and label it and date it so you know what plant you have taken it from and when. All rose cuttings look similar and it is easy to mix them up! The next step is the most important one and this is why you need the date: other than checking whether watering is needed, leave your cuttings alone. Absolutely alone. Don’t disturb them for at least a year.
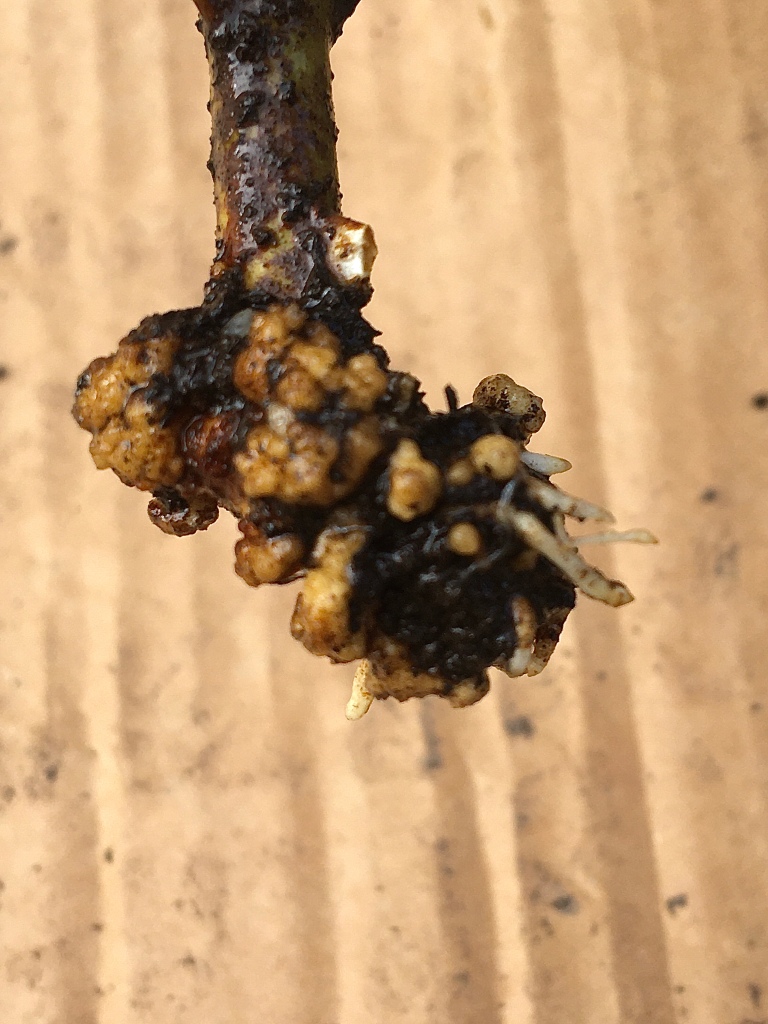
Two years is better still. Here’s why: the above shows a cutting taken a year ago – I’ve taken the cutting out of its pot and washed the root ball to photograph it. You’ll see that it’s just starting to form roots, but they’re really not well established at all yet.
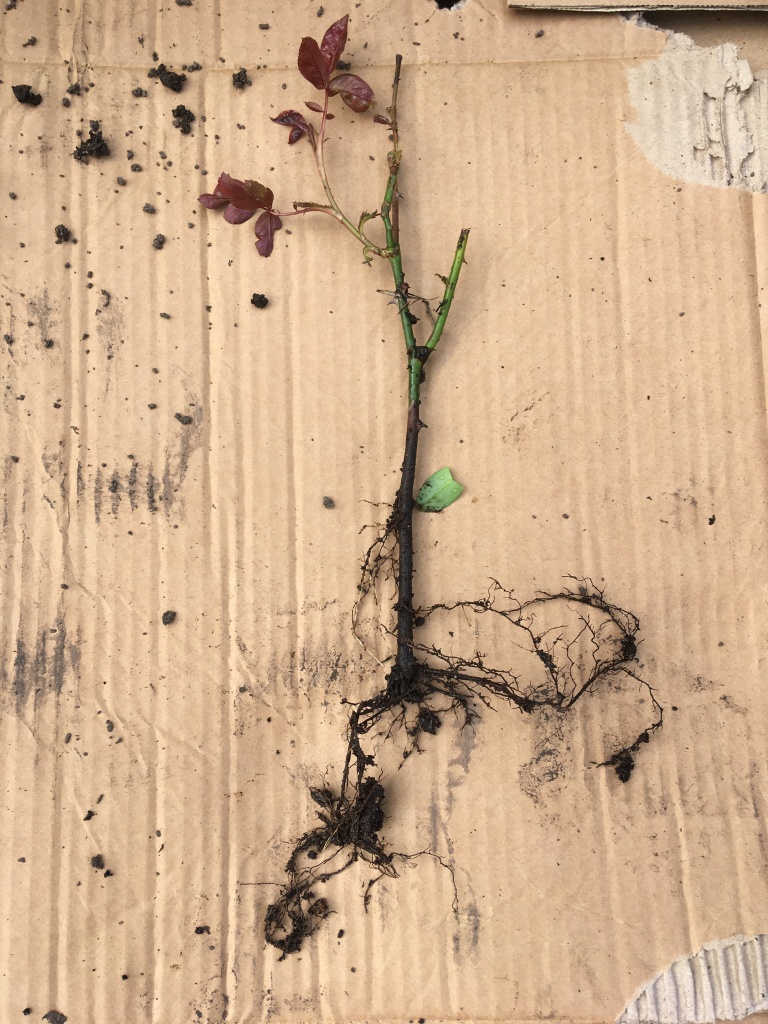
This photo shows a small cutting taken two years ago: you can clearly see that the roots are much more established and this plant will be far more likely to survive planting out as a result. The two year old cutting is ready to plant out. I generally plant out successfully rooted rose cuttings around springtime but that is mainly because that’s the time I like to adjust my borders and clear my nursery areas for the new season: roses are tough, and whether grown in pots or in open ground, healthy rooted cuttings should transplant at almost any time of year, provided it’s neither freezing cold nor scorching hot.
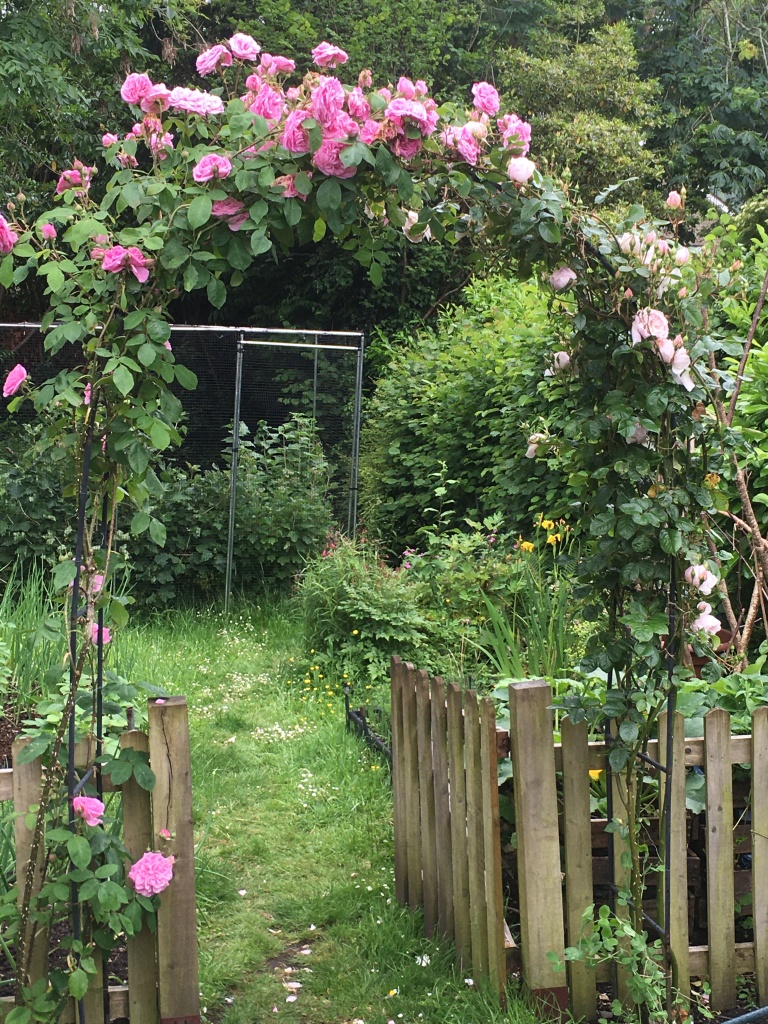
This photo shows two roses grown from cuttings, on my rose arch. Both have since parented many more cuttings which are now in many other people’s gardens! Roses make very nice gifts. Have fun creating lots of new plants!
Please join me in thanking Arwen for her gardening tips today. If you’d like to read more from her then follow her blog here. Arwen’s garden in Wales also featured in my Enchanting Gardens series and you can read about it here.
Catch up with previous posts in the Garden Tips series:
Propagating African Violets
Cathy’s favourite gardening tool: Wolf Garten Weeding And Planting Knife.
Fred’s tips for propagating Begonias.
Catherine’s post, gardening with arthritis.
Sarah’s tips for propagating Erigeron.
TopDock’s tips for growing plants from seeds.


The only luck I ever had with rooting rose cuttings was with a rose called, White Pavement. I placed several short cuttings dabbed with root hormone into a small pot filled with compost that had a layer of grit about an inch thick on the very top. I placed the pot into a small clear storage bin and placed the clear top askew over the bin. I didn’t clamp the lid shut completely, but left it open a crack for air flow. In the same small box were several other cuttings from various shrubs, etc.
Placed in a shady spot out of range of direct sunlight, I had roots on the cuttings in only a few months, and actually planted that rose out. I’ll see in a month or so whether it survived winter.
The box also had cuttings from the two Philadelphius we have, they also rooted and were planted out about the same time. Fingers crossed they all made it through winter!
LikeLiked by 4 people
Well done, it always feels good when plants grow for us.
LikeLiked by 2 people
I never bother with rooting hormone powder any more – I think it goes off quickly once the pot is opened and I think I always used to hold onto it too long! I’m not convinced it makes a huge difference, though mycorrhizal fungi might… what do you think Kate? Do you find it makes a big difference?
LikeLiked by 3 people
I didn’t know a thing about it when I first acquired the powder, so did a fair amount of research on proper use. Following those guidelines, I can say my results with it have been better than when I wasn’t using it. My success rate has always been negligible either way, but I feel while not being a ‘game-changer’, it’s afforded me the limited success I have achieved. The box method idea I used was from other ‘experts’ offering advice. The whole point of the box is to mimic a greenhouse growing environment, provide consistent humidity, static temps, etc. That part proved to be bang on. Granted, I used all the techniques of early morning cutting gathering, timely placement into the prepared pots, cut angles, etc. My attempts pre- box and powder went to mushy slime or dried up to stalks. 🙂 IDK I guess use what works, IF I had a 5% of all the cuttings I’ve ever attempted I could open a nursery!
LikeLiked by 2 people
That’s really interesting Kate, thanks, as there seems to be a real range of experiences with the powder (and indeed with cuttings in general.) I definitely find that covering to retain moisture and adding some bottom heat help with softwood cuttings but I find hardwood cuttings a slower, colder affair with less watering needed. Mind you I have a very high attrition rate myself! Using a very gritty potting mix for softwood cuttings, often as high as 50:50 perlite to compost, sometimes seems to help me with things that seem very prone to rotting off before rooting. Hardwood cuttings seem to need a lot more moisture retention in the pot but a less humid environment externally, but that might just be in my garden!
LikeLiked by 2 people
Thanks to both of you. Very interesting!
LikeLiked by 2 people
Thanks Fred.
LikeLiked by 2 people
What an excellent post! Thank you Arwen and Rosie. I’ve taken rose cuttings in the past, had a few successes and way more than a few failures. But this sets out the process so clearly, that I’m persuaded that I need to have another attempt!
LikeLiked by 3 people
Thanks Catherine, I shall be following the advice closely.
LikeLiked by 1 person
Very interesting to read how easy it is! Thanks Arwen and Rosie for sharing!
LikeLiked by 1 person
I am always game to try plants for free.
LikeLiked by 1 person
Do let us know how you get on! Even just playing around with your prunings can be fun and productive!
LikeLiked by 1 person
So far I have one success.
LikeLiked by 1 person
Pingback: Rosie Amber’s garden tips series – Notes from the Under-Gardener
Well done, a great article. I find some roses very easy to strike whilst others are a bit more stubborn.
LikeLiked by 3 people
That’s good to hear as some I just can’t get on with.
LikeLike
Many thanks! The pub near me has a beautiful red climber that I cannot get to strike, no matter how many cuttings I “borrow”! 😂 it’s the only rose that has ever consistently defeated me!
LikeLiked by 2 people
That’s weird. My daughter has a gorgeous deep red climber, I don’t know what it is, but I just can’t get it to strike either.
LikeLiked by 2 people
I wonder if it’s the same variety? I’m going to try again, I refuse to be beaten! Besides, that pub owes me for countless disturbed nights’ sleep! 😂
LikeLiked by 1 person
Pingback: March 26, 2024 History and its Consequences by Loleta Abi – A Dash of Words with Loleta Abi Romance Author
Great tips! 😘⚘🌸 It is a magical talent to grow roses from cuttings. A very satisfying thing to do.
LikeLiked by 1 person